If you are someone who has attended a significant number of yoga classes or perhaps are a fitness guru, then you might actually heard of the mighty psoas. Most individuals refer to it as the body’s center of movement based upon its location and myriad of physiological functions.
When you come across someone who uses the term “psoas”, it is most likely that the person is referring to the combination of two muscles, the iliacus as well as the psoas major muscle or collectively, the Iliopsoas. Basically, the psoas is a triangle of muscle fibers which attach on either side of the lower thoracic and lumbar spine and insert on the medial side of each femur. The psoas has the ability to either make us perform hip flexion or move the spine.
Unfortunately, when we activate the psoas to move our spine, our psoas typically does so in an unfavourable way by drawing the tailbone down and forward. This results in our muscles getting shorten, which leads to the removal of the important curvature of our lower back and eventually, causing lower back pain. So, it isn’t merely tight hamstrings that contributes to back aches. A tight psoas can also lead to a tight lower back.
Not to worry, this issue can be solved with the ultimate yoga pose for the psoas, which is the Half Pigeon. This pose is effective in opening the hip. When you place a bent leg out in front of you, straighten the other leg behind you and keep your pelvis stable, you will be able to isolate the stretch to the psoas.
http://www.activelifedc.com/yoga/yoga-for-athletes-pose-of-the-month-the-ultimate-pose-for-the-psoas/113153
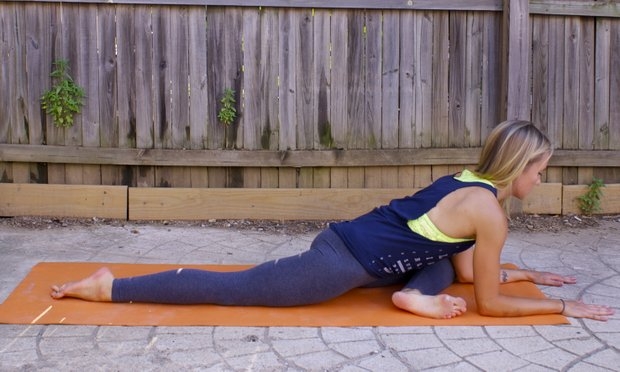
Here are the steps to performing the Half Pigeon yoga pose:
Begin by kneeling on all fours in Table Top position. Then, draw your right knee forward onto the floor to the inside of your right hand, while heel-toeing your right foot as close to the inside of your left hand as possible. Flex your right foot and use your hands to assist in aligning your right shin with the front edge of your mat. Slowly walk your hands back to your hips for support. While performing this, slide your left leg back and untuck your left toes when you have extended the leg as far back as possible. Ensure that you keep your hips level and squared to the front. You can either stay up on your palms or slowly walk them toward the front of your mat, coming onto your forearms. Hold the position for between 10-20 deep breaths before walking your hands back into your hips and returning to your starting position. Repeat the approach on the left side after.
If you are looking for certified yoga instructors to assist you in your learning, check out OMG Yoga. We offer a wide variety of yoga classes in Singapore, catering to different individuals’ needs.